最近项目的CDH集群要加LDAP认证。
做完了之后我把过程记录一下,方便以后有用的话来看看。
关注博主不迷路,获取更多干货资源

1 OpenLDAP服务端安装
1.1 安装openldap-servers软件
安装基础依赖
| yum install -y zlib-devel bzip2-devel openssl-devel ncurses-devel epel-release gcc gcc-c++ xz-devel readline-devel gdbm-devel sqlite-devel tk-devel db4-devel libpcap-devel libffi-devel e2fsprogs e2fsprogs-libs glibc-devel krb5-devel libcom_err-devel libselinux-devel libss
|
安装软件
| yum -y install openldap-servers pam_ldap bind-utils
|
1.2 配置OpenLDAP日志
| echo local4.* /var/log/ldap.log >> /etc/rsyslog.conf
systemctl restart rsyslog.service
|
2 OpenLDAP服务配置
将默认的配置文件复制到特定目录
| cp /usr/share/openldap-servers/slapd.ldif /etc/openldap/slapd.ldif
|
修改配置文件
后面加了# ************************的是需要改动的
注意:配置文件中需要注意的TLS Settings配置,如果不启用则可以将相关的配置注释。
| vim /etc/openldap/slapd.ldif
|
1
2
3
4
5
6
7
8
9
10
11
12
13
14
15
16
17
18
19
20
21
22
23
24
25
26
27
28
29
30
31
32
33
34
35
36
37
38
39
40
41
42
43
44
45
46
47
48
49
50
51
52
53
54
55
56
57
58
59
60
61
62
63
64
65
66
67
68
69
70
71
| #
# This file should NOT be world readable.
#
dn: cn=config
objectClass: olcGlobal
cn: config
olcArgsFile: /var/run/openldap/slapd.args
olcPidFile: /var/run/openldap/slapd.pid
#
#
#olcTLSCertificateFile: /etc/openldap/certs/ldap.crt
#olcTLSCertificateKeyFile: /etc/openldap/certs/ldap.key
#
#
dn: cn=schema,cn=config
objectClass: olcSchemaConfig
cn: schema
include: file:///etc/openldap/schema/corba.ldif # ************************
include: file:///etc/openldap/schema/core.ldif # ************************
include: file:///etc/openldap/schema/cosine.ldif # ************************
include: file:///etc/openldap/schema/duaconf.ldif # ************************
include: file:///etc/openldap/schema/dyngroup.ldif # ************************
include: file:///etc/openldap/schema/inetKorgperson.ldif # ************************
include: file:///etc/openldap/schema/java.ldif # ************************
include: file:///etc/openldap/schema/misc.ldif # ************************
include: file:///etc/openldap/schema/nis.ldif # ************************
include: file:///etc/openldap/schema/openldap.ldif # ************************
include: file:///etc/openldap/schema/ppolicy.ldif # ************************
include: file:///etc/openldap/schema/collective.ldif # ************************
#
#
dn: olcDatabase=frontend,cn=config
objectClass: olcDatabaseConfig
objectClass: olcFrontendConfig
olcDatabase: frontend
#
#
dn: olcDatabase=config,cn=config
objectClass: olcDatabaseConfig
olcDatabase: config
olcAccess: to * by dn.base="gidNumber=0+uidNumber=0,cn=peercred,cn=external,cn=auth" manage by * none
#
#
dn: olcDatabase=monitor,cn=config
objectClass: olcDatabaseConfig
olcDatabase: monitor
olcAccess: to * by dn.base="gidNumber=0+uidNumber=0,cn=peercred,cn=external,cn=auth" read by
dn.base="cn=Manager,dc=bigdata,dc=hex,dc=com" read by * none # ************************
#
#
dn: olcDatabase=hdb,cn=config
objectClass: olcDatabaseConfig
objectClass: olcHdbConfig
olcDatabase: hdb
olcSuffix: dc=bigdata,dc=hex,dc=com # ************************
olcRootDN: cn=Manager,dc=bigdata,dc=hex,dc=com # ************************
olcRootPW: 123456 # ************************
olcDbDirectory: /var/lib/ldap
olcDbIndex: objectClass eq,pres
olcDbIndex: ou,cn,mail,surname,givenname eq,pres,sub
olcDbIndex: uidNumber,gidNumber,loginShell eq,pres
olcDbIndex: uid,memberUid eq,pres,sub
olcDbIndex: nisMapName,nisMapEntry eq,pres,sub
|
重新生成OpenLDAP的配置
| # 删除/var/lib/ldap中旧数据(slapd启动时会根据/etc/openldap/slapd.d中配置生成数据)
rm -rf /var/lib/ldap/*
# 删除/etc/openldap/slapd.d/中旧的配置
rm -rf /etc/openldap/slapd.d/*
# 生产/etc/openldap/slapd.d/中新的配置
slapadd -F /etc/openldap/slapd.d -n 0 -l /etc/openldap/slapd.ldif
# 测试新的配置文件是否正确,返回"config file testing succeeded"则表示配置文件正确。
slaptest -u -F /etc/openldap/slapd.d
# 将默认的配置文件复制到特定目录
cp /usr/share/openldap-servers/DB_CONFIG.example /var/lib/ldap/DB_CONFIG
|
修改相关目录权限
| chown -R ldap:ldap /etc/openldap/slapd.d
chown -R ldap:ldap /var/lib/ldap
|
启动LDAP服务
| systemctl start slapd
systemctl restart slapd
systemctl status slapd
systemctl enable slapd
systemctl is-enabled slapd
|
3 OpenLDAP客户端安装
3.1 安装openldap-clients软件
| yum -y install openldap-clients
|
3.2 修改配置文件
| vim /etc/openldap/ldap.conf
|
| BASE dc=bigdata,dc=hex,dc=com
URI ldap://192.168.1.61:389
|
该配置文件主要用于客户端命令访问LDAP,例如ldapsearch
注意:如果未配置/etc/openldap/ldap.conf文件则需要在ldapsearch命令后加 -h 192.168.1.61 -p 389 -b “dc=bigdata,dc=hex,dc=com” 参数。
4 OpenLDAP客户端命令
4.1 添加根域及管理员账号
| dn: dc=bigdata,dc=hex,dc=com
dc: bigdata
objectClass: top
objectClass: domain
dn: cn=Manager,dc=bigdata,dc=hex,dc=com
cn: Manager
objectClass: organizationalRole
|
| ldapadd -x -D "cn=Manager,dc=bigdata,dc=hex,dc=com" -w 123456 -f root.ldif
|
4.2 添加基础文件和用户组
| dn: ou=People,dc=bigdata,dc=hex,dc=com
ou: People
objectClass: top
objectClass: organizationalUnit
dn: ou=Group,dc=bigdata,dc=hex,dc=com
ou: Group
objectClass: top
objectClass: organizationalUnit
|
| ldapadd -x -D "cn=Manager,dc=bigdata,dc=hex,dc=com" -w 123456 -f base.ldif
|
4.3 添加用户和用户组
1
2
3
4
5
6
7
8
9
10
11
12
13
14
15
16
17
18
19
| dn: cn=xiaoma,ou=Group,dc=bigdata,dc=hex,dc=com
objectClass: posixGroup
objectClass: top
cn: xiaoma
gidNumber: 1001
memberUid: xiaoma
dn: uid=xiaoma,ou=People,dc=bigdata,dc=hex,dc=com
uid: xiaoma
cn: xiaoma
objectClass: account
objectClass: posixAccount
objectClass: top
userPassword: xiaoma123
loginShell: /bin/bash
uidNumber: 1001
gidNumber: 1001
homeDirectory: /home/xiaoma
|
| ldapadd -x -D "cn=Manager,dc=bigdata,dc=hex,dc=com" -w 123456 -f xiaoma.ldif
|
4.4 修改用户密码
| dn: uid=xiaoma,ou=People,dc=bigdata,dc=hex,dc=com
changetype: modify
replace: userPassword
userPassword: 1234567
|
| ldapmodify -x -D "cn=Manager,dc=bigdata,dc=hex,dc=com" -w 123456 -f changepasswd.ldif
|
4.5 查看用户信息
| ldapsearch -x -D 'cn=Manager,dc=bigdata,dc=hex,dc=com' -w 123456 -b 'ou=People,dc=bigdata,dc=hex,dc=com'
|
4.6 查看用户组信息
| ldapsearch -x -D 'cn=Manager,dc=bigdata,dc=hex,dc=com' -w 123456 -b 'ou=Group,dc=bigdata,dc=hex,dc=com'
|
4.7 删除用户信息
| ldapdelete -x -D "cn=Manager,dc=bigdata,dc=hex,dc=com" -w 123456 'uid=xiaoma,ou=People,dc=bigdata,dc=hex,dc=com'
|
4.8 删除组信息
| ldapdelete -x -D "cn=Manager,dc=bigdata,dc=hex,dc=com" -w 123456 'cn=Manager,ou=Group1,dc=bigdata,dc=hex,dc=com'
|
5 OpenLDAP可视化工具
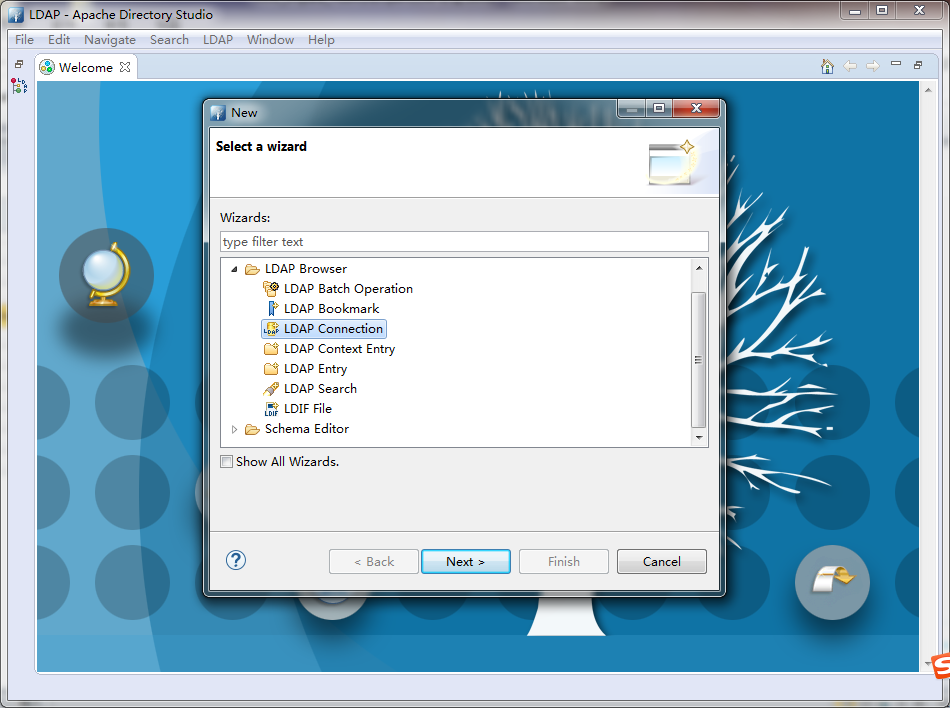
5.1 安装Apache Directory Studio
下载地址:https://directory.apache.org/studio/downloads.html(注意:如果安装提示jdk需要11+之类的,换个低版本的下载即可)
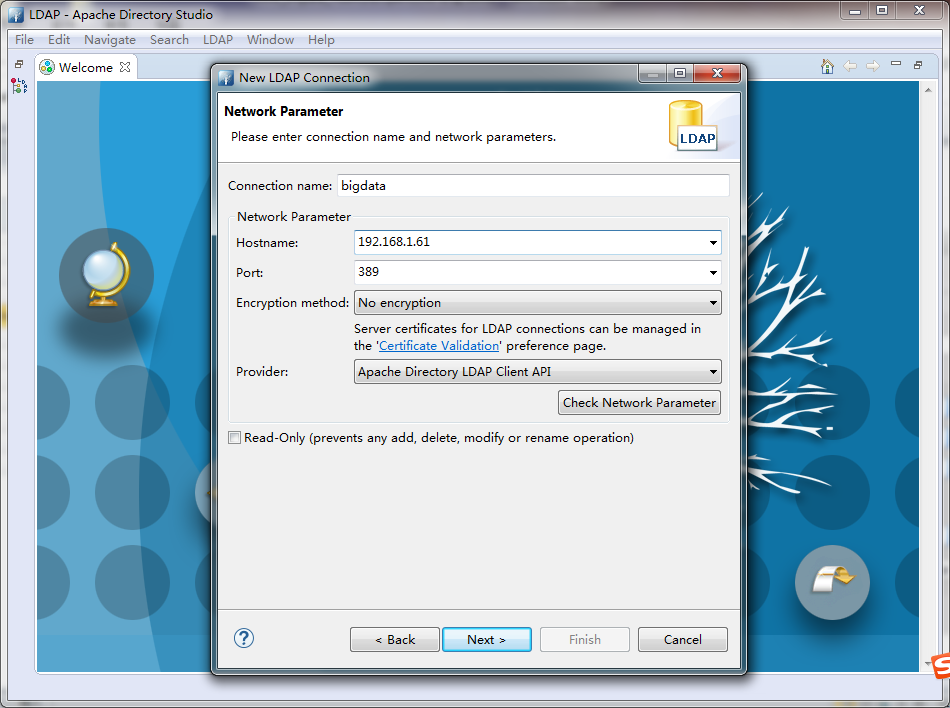
5.2 创建LDAP connection
点击File > New
设置LDAP服务器地址
设置认证账户密码,使用LDAP超级用户Manager
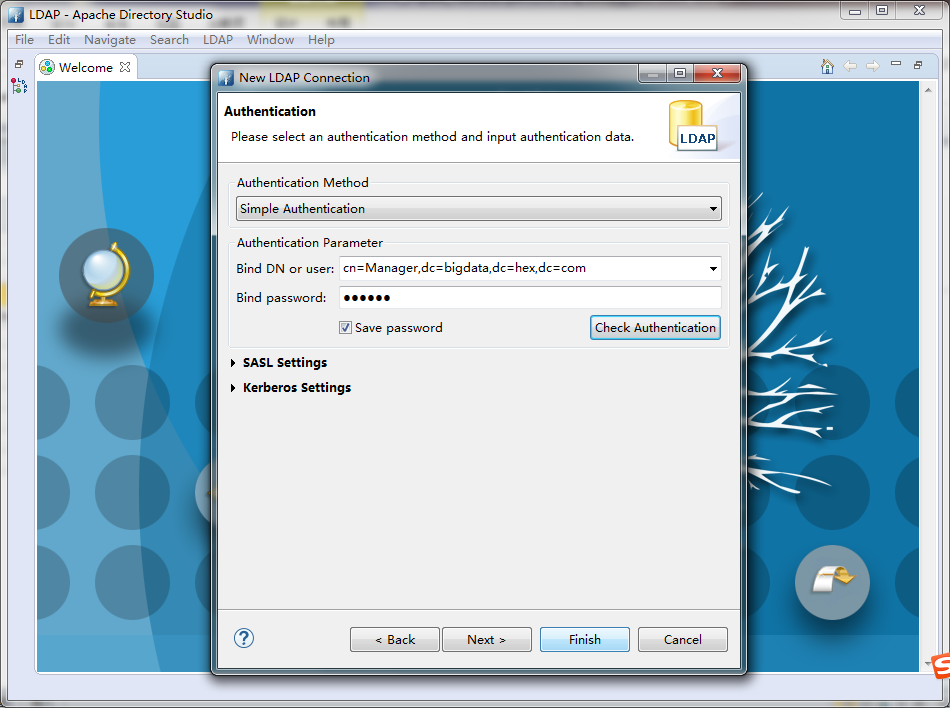
设置完毕后,点击Check Authentication确认输入的账户密码是否可以登录
5.3 初始化LDAP根节点
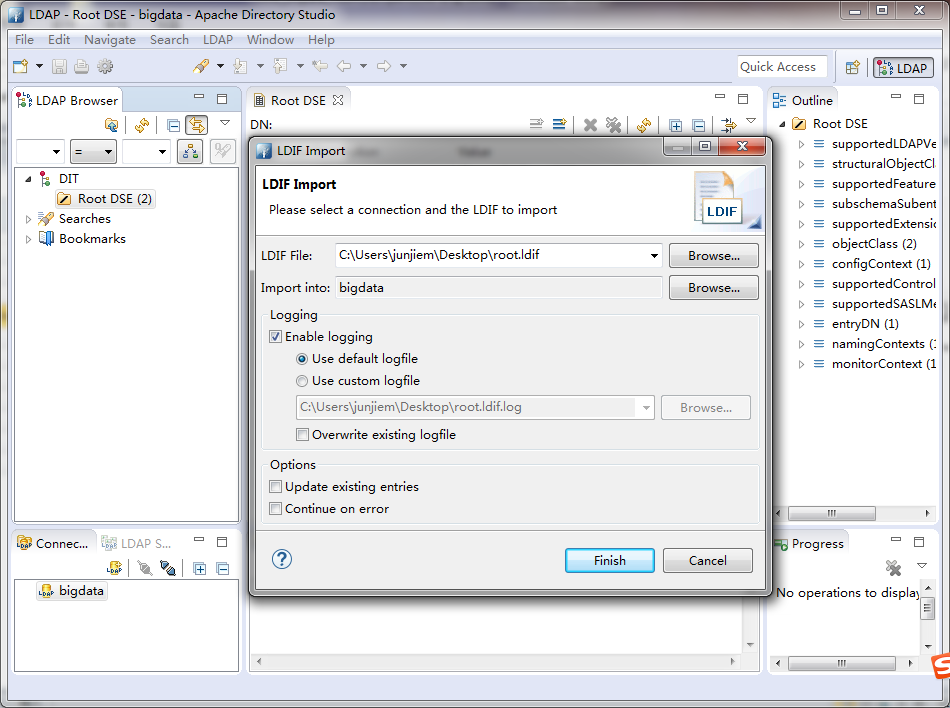
编写root.ldif文件
(创建在本机,到时通过界面导入,注意”,”间不能有空格)
| # root node
dn: dc=bigdata,dc=hex,dc=com
dc: bigdata
objectClass: dcObject
objectClass: organizationalUnit
ou: bigdata,hex,com
|
导入root.ldfi
点击Root DSE右键 > Import > LDIF Import

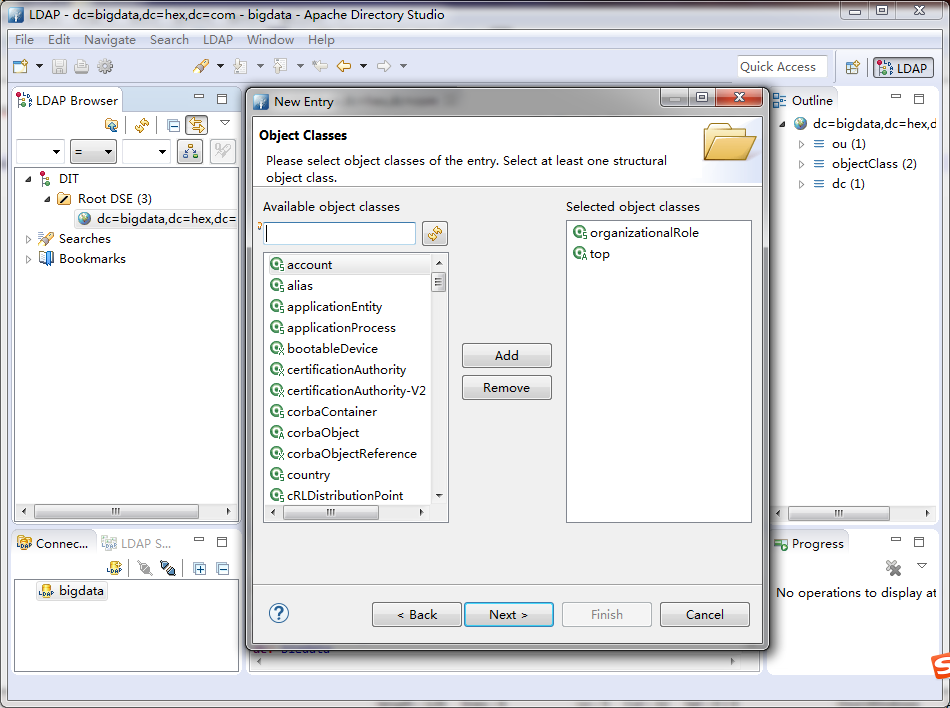
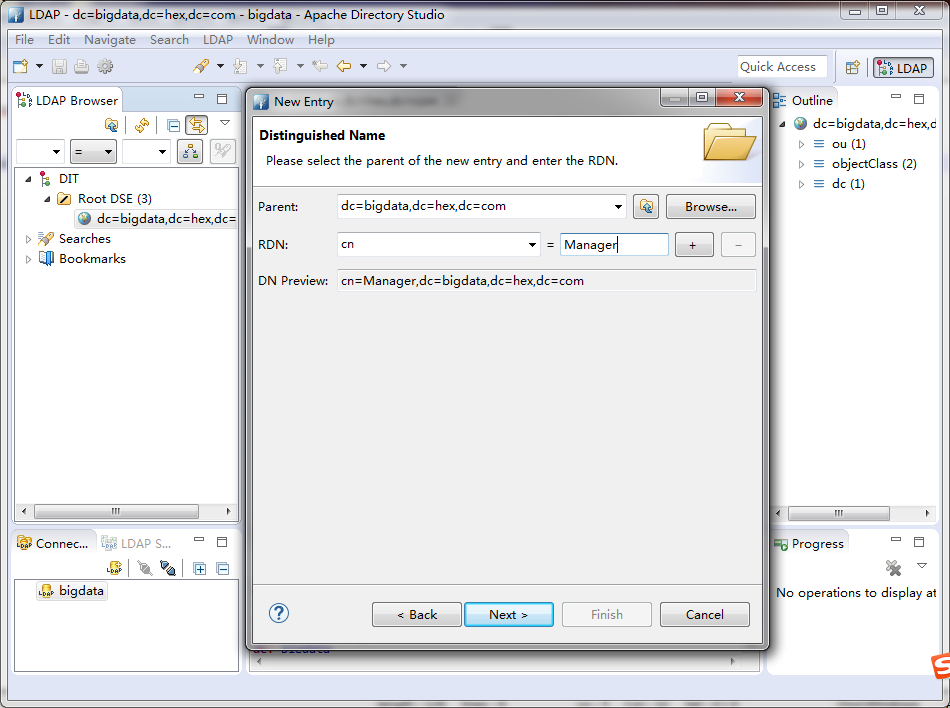
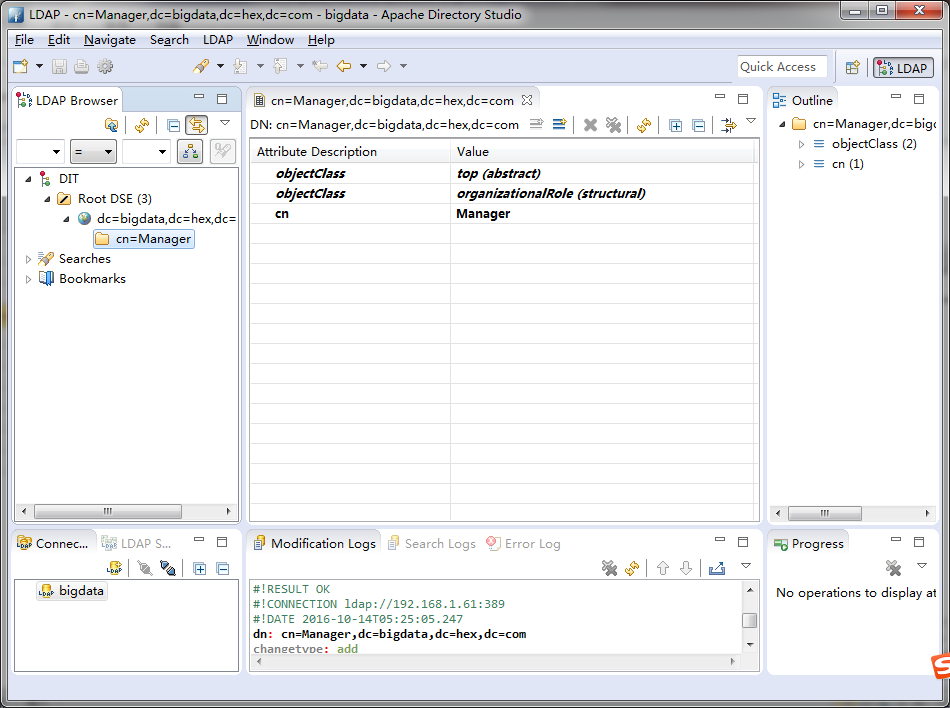
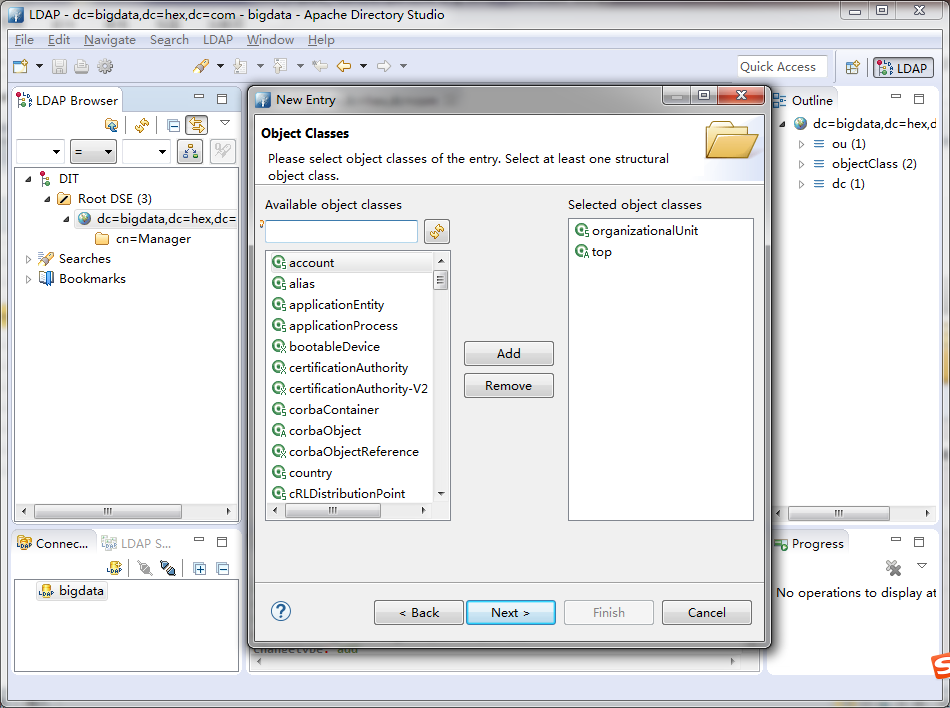
5.4 增加Manager
点击dc=bigdata,dc=hex,dc=com右键 > New > New Entry

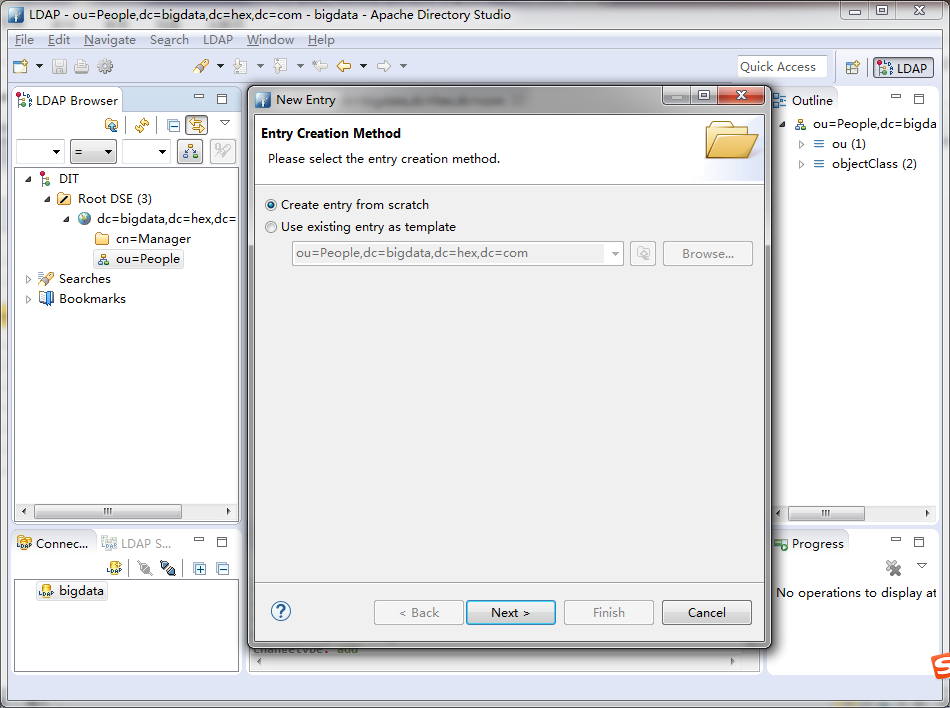
5.5 建立一个名为People的organization unit,用于存放用户
点击dc=bigdata,dc=hex,dc=com右键 > New > New Entry


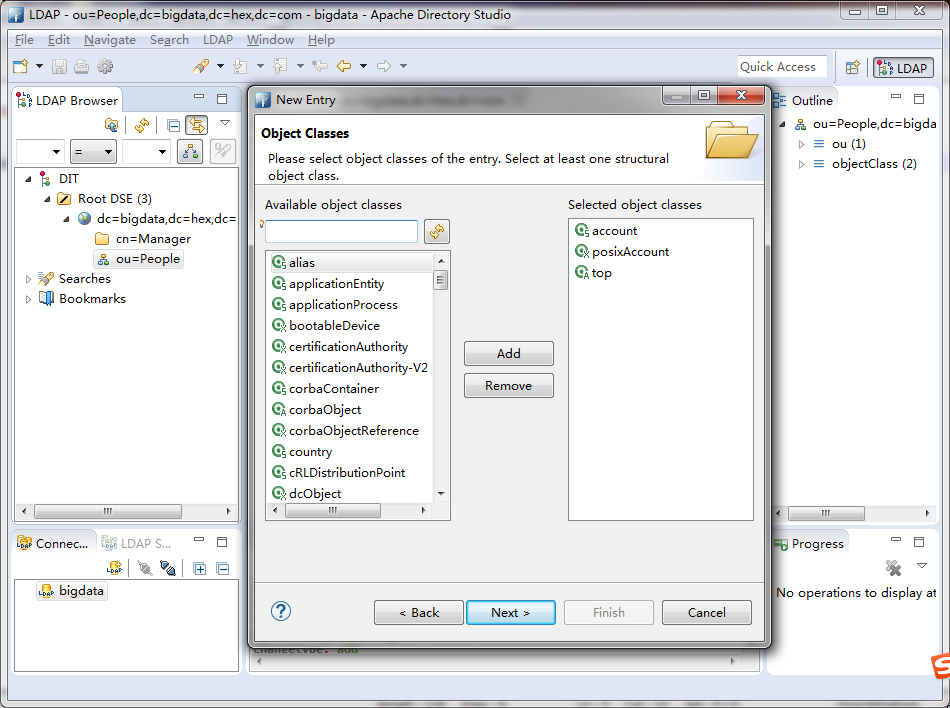
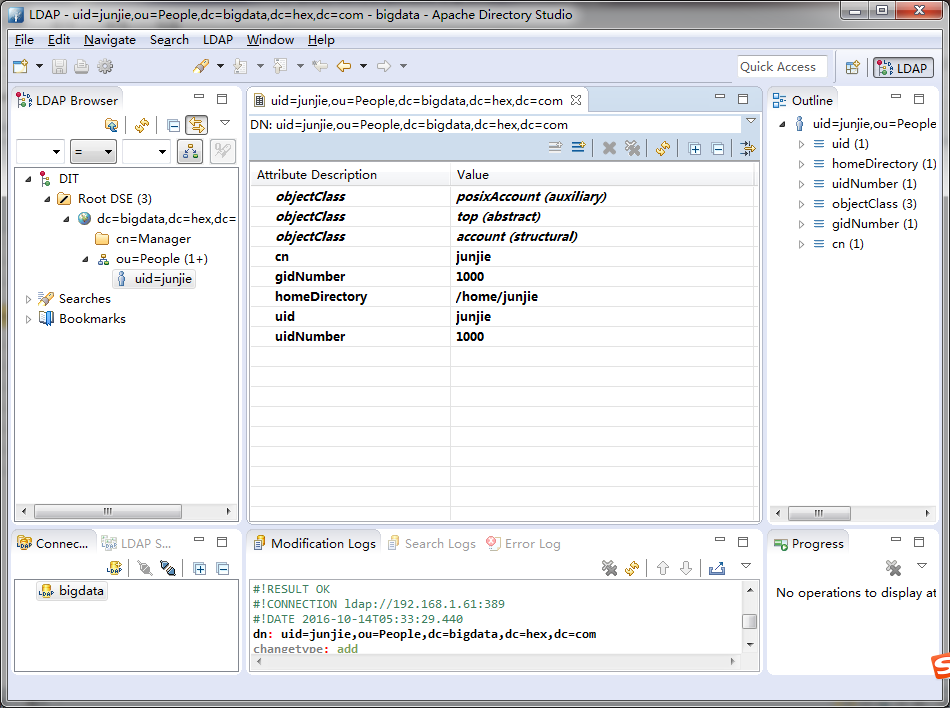
5.6 在People下创建用户
点击ou=People右键 > New > New Entry
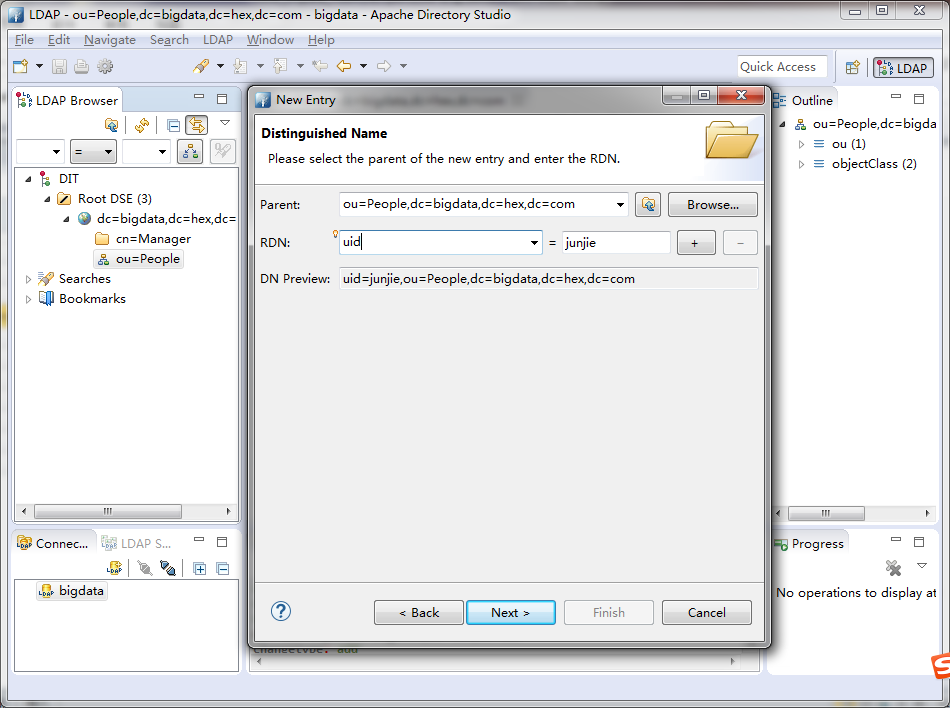
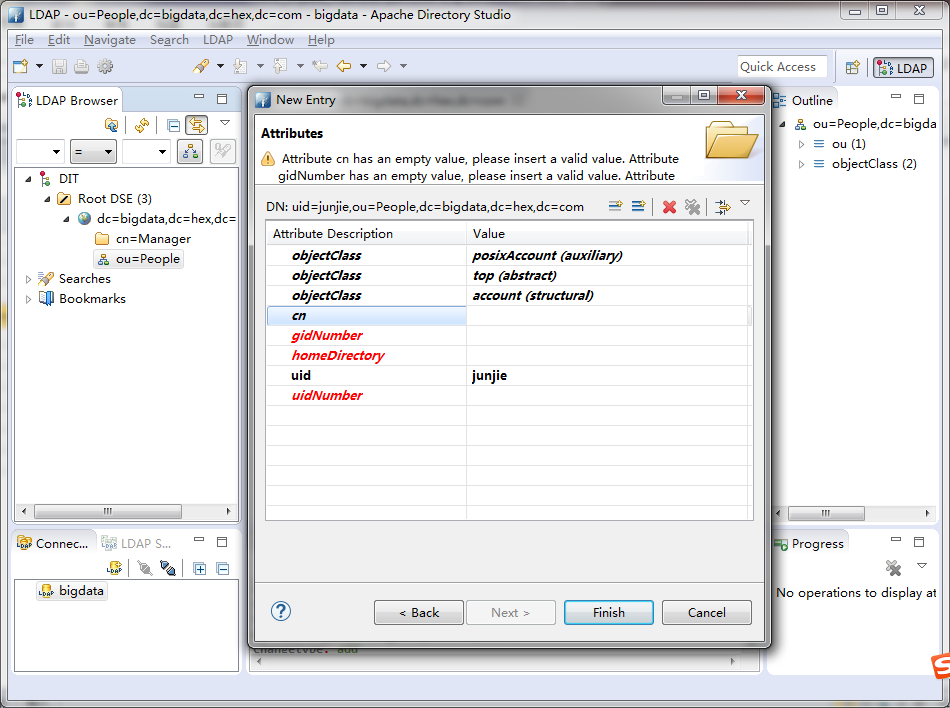
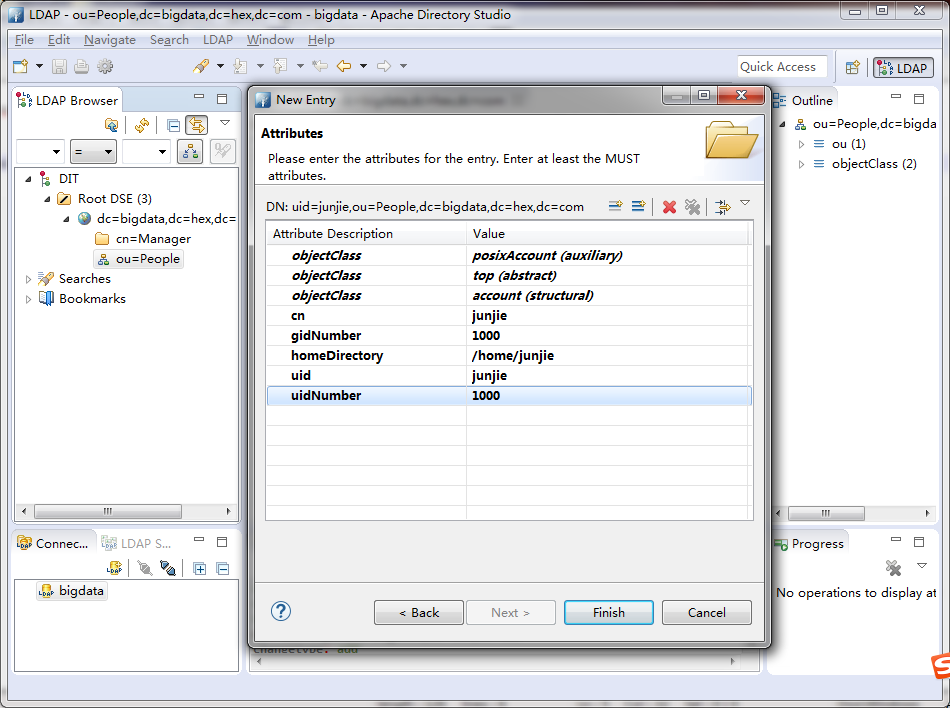
注:这里的gidNumber和uidNumber需要大于999,小于999的为系统保留用户,推荐使用2000之后的值作为id。
设置junjie的密码:
点击uid=junjie,在右侧属性栏右键 > New Attribute
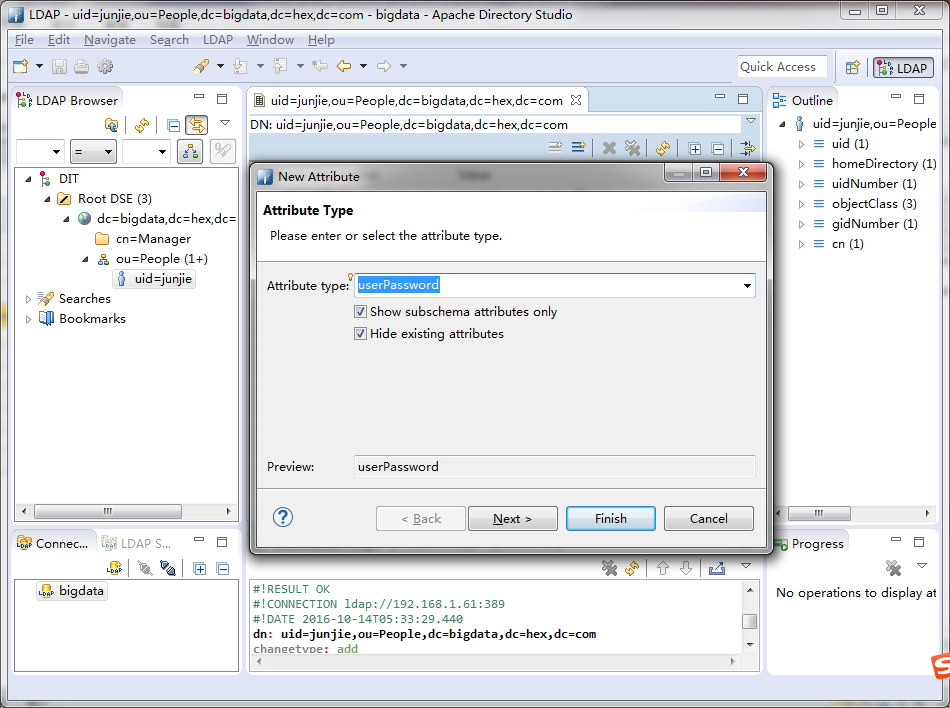


这里设置为111111
同上再设置loginShell=/bin/bash
5.7 创建一个名为Group的organization unit,创建过程同People

5.8 在Group下创建组
点击ou=Group右键 > New > New Entry


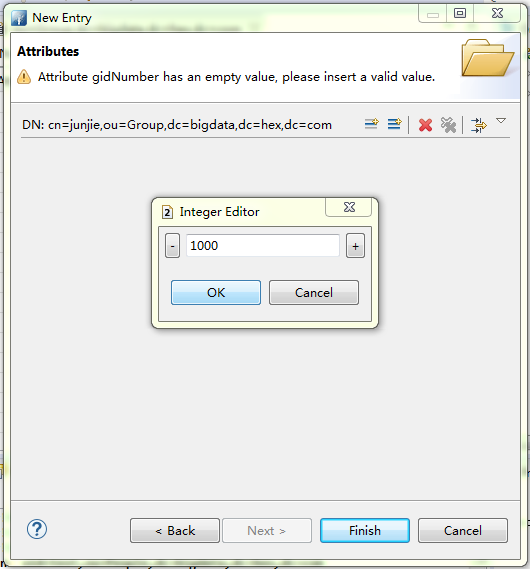
注:这里的值(gidNumber)与对应的junjie用户中输入的值(gidNumber)一致,表示junjie这个用户属于junjie这个组。这里只做一个用户属于其同名的组。

5.9 一个用户添加到多个组
点击ou=Group右键 > New > New Entry


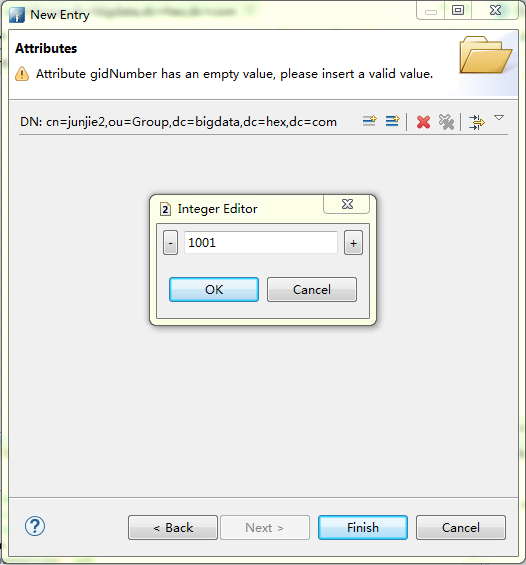
注:这里的值(gidNumber)不能与之前junjie组的值(gidNumber)一样。
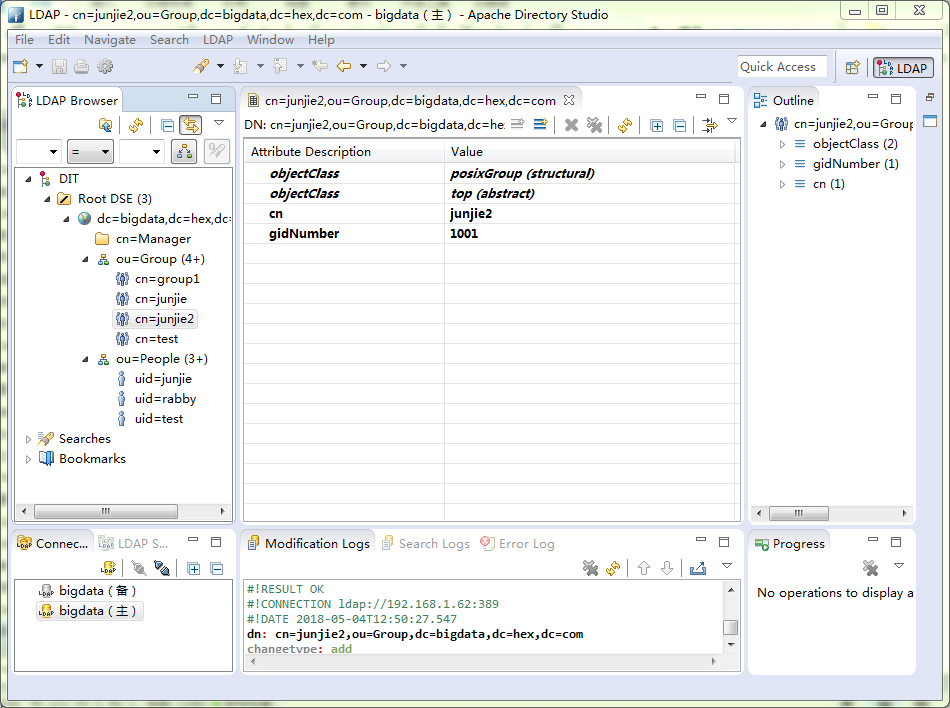
设置成员的UID:
点击cn=junjie2,在右侧属性栏右键 > New Attribute
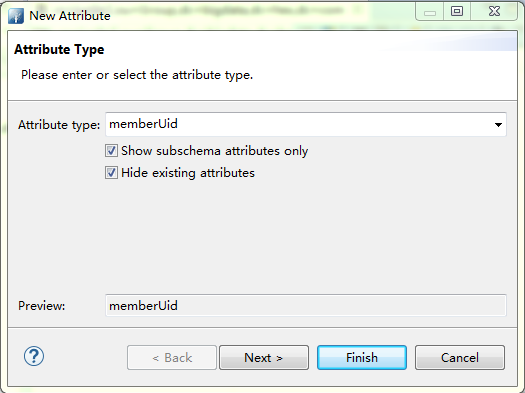
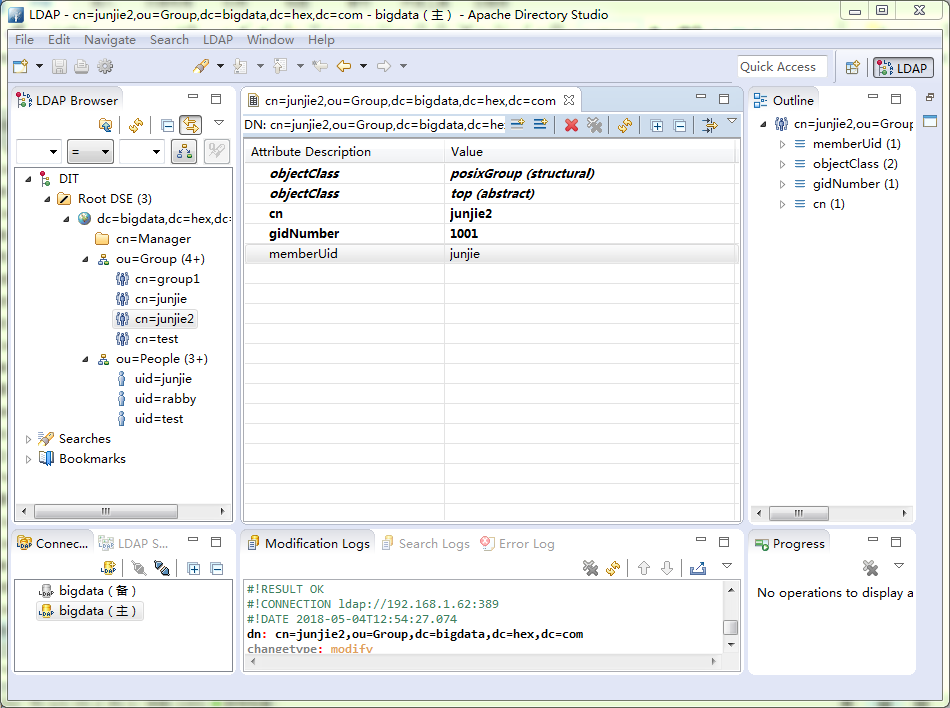
memberUid中输入用户的uid,这里memberUid可以有多个。
6 各组件开启LDAP
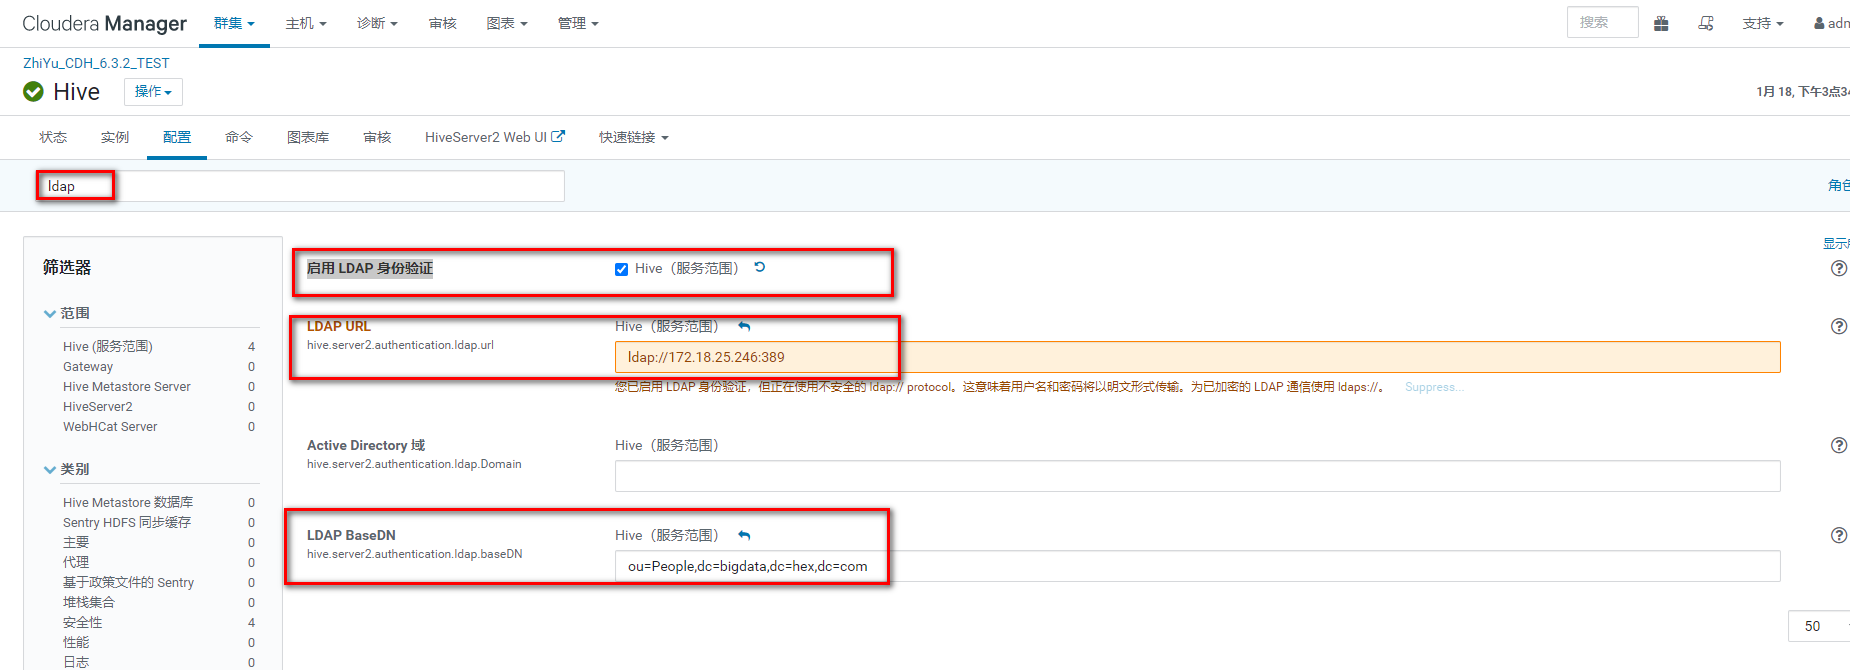
6.1 Hive开启LDAP
搜索ldap
1 启用 LDAP 身份验证 改为true
2 LDAP URL添加ldap://172.18.25.246:389
注:如果OpenLDAP实现了主主同步HA,则这里输入类似如下的配置”ldap://172.18.25.246:389 ldap://172.18.25.247:389”。
3 LDAP BaseDN添加ou=People,dc=bigdata,dc=hex,dc=com
该配置必须指向用户所在的Organization Unit(ou),因为Hive会直接使用uid+baseDN作为该用户的dn在LDAP中进行查询。
4 重启hive等相关服务
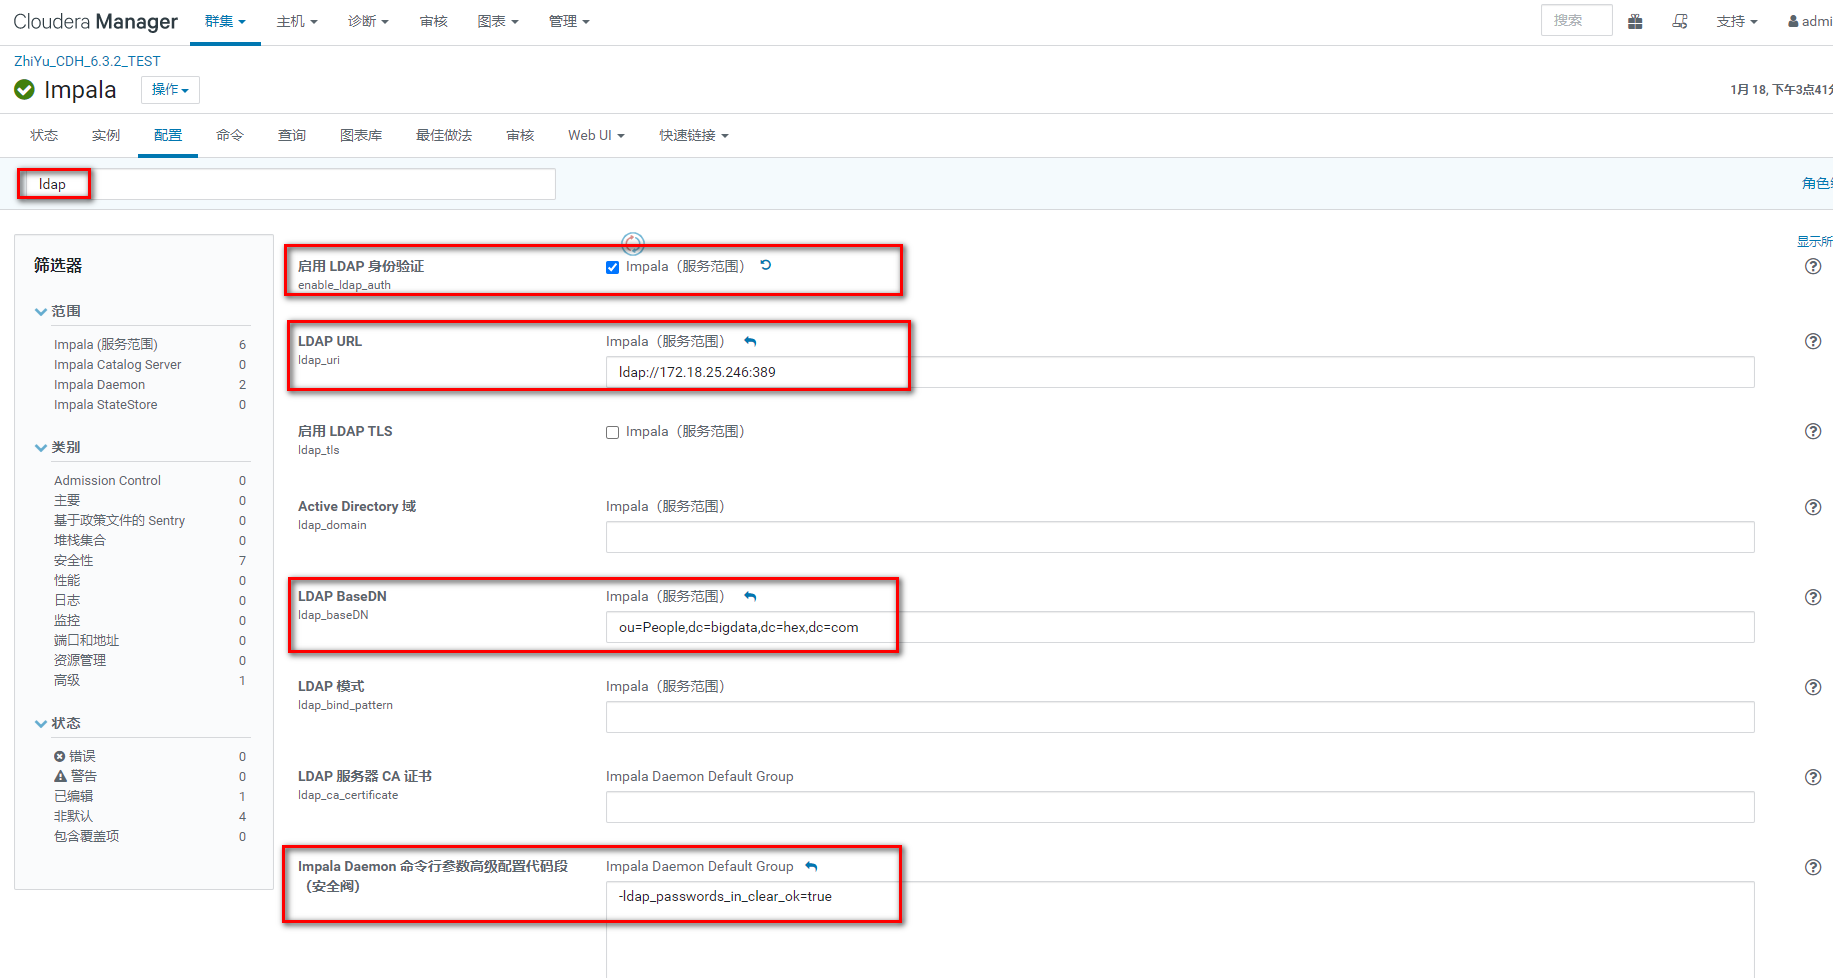
6.2 Impala开启LDAP
搜索ldap
1 启用 LDAP 身份验证 改为true
2 LDAP URL添加ldap://172.18.25.246:389
注:如果OpenLDAP实现了主主同步HA,则这里输入类似如下的配置”ldap://172.18.25.246:389 ldap://172.18.25.247:389”。
3 LDAP BaseDN添加ou=People,dc=bigdata,dc=hex,dc=com
4 Impala Daemon 命令行参数高级配置代码段(安全阀)添加-ldap_passwords_in_clear_ok=true
没有启用LDAP TLS时(搜索”ldap_tls”可以查看是否启用),需要在”Impala Daemon命令行参数高级配置代码段(安全阀)”添加”-ldap_passwords_in_clear_ok=true”
5 重启impala等相关服务
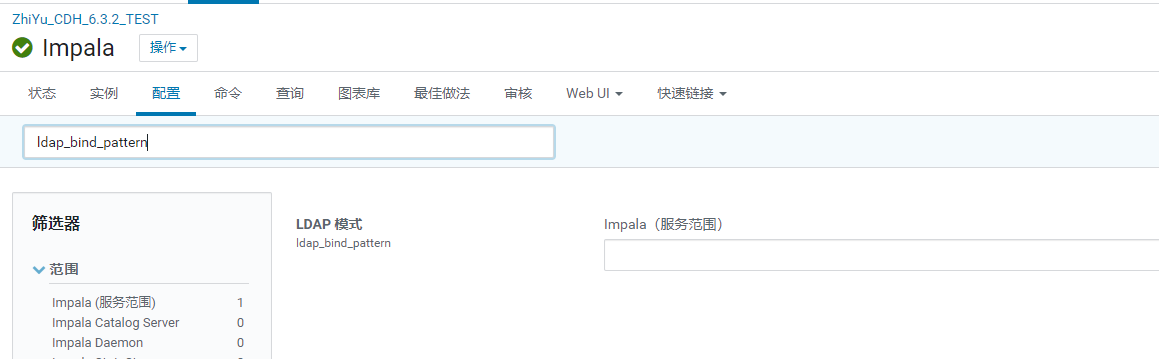
6.2.1 注意事项
注意1:仅当需要做严格的用户绑定,或用户名不是通过uid指定时,配置"LDAP 模式"。此参数与 LDAP 域和 LDAP BaseDN 相互排斥。(我们这里不做这个配置)
搜索”ldap_bind_pattern”添加”uid=#UID,ou=People,dc=bigdata,dc=hex,dc=com”
7 各种方式访问开启LDAP的CDH集群
7.1 Beeline_Hive访问
| beeline -u jdbc:hive2://172.18.25.246:10000/default -n testuser -p 123456 -e "show databases;"
|
7.2 Impala-shell访问
| impala-shell -l -i "node1.zhiyu.cn:21000" -u testuser --ldap_password="echo -n 123456" --auth_creds_ok_in_clear --database hive_uat -q "select * from hdc_agent_inf"
|
7.3 Java_JDBC访问Hive
| PoolProperties poolProperties = getPoolProperties();
properties.setInitialSize(1);
DataSource dataSource = new DataSource(poolProperties);
dataSource.setDriverClassName("org.apache.hive.jdbc.HiveDriver");
dataSource.setUrl("jdbc:hive2://172.18.25.246:10000");
dataSource.setUsername(username);
dataSource.setPassword(password);
|
7.4 Java_JDBC访问Impala
使用hive驱动
| PoolProperties poolProperties = getPoolProperties();
properties.setInitialSize(1);
DataSource dataSource = new DataSource(poolProperties);
dataSource.setDriverClassName("org.apache.hive.jdbc.HiveDriver");
dataSource.setUrl("jdbc:hive2://172.18.25.246:21050");
dataSource.setUsername(username);
dataSource.setPassword(password);
|
使用impala驱动
| PoolProperties poolProperties = getPoolProperties();
properties.setInitialSize(1);
DataSource dataSource = new DataSource(poolProperties);
dataSource.setDriverClassName("com.cloudera.impala.jdbc41.Drive");
dataSource.setUrl("jdbc:impala://172.18.25.246:21050;AuthMech=3");
dataSource.setUsername(username);
dataSource.setPassword(password);
|
Finally 躺板板
红伞伞白杆杆,吃完一起躺板板
躺板板埋山山,亲朋都来吃饭饭
饭饭里有红伞伞,吃完全村埋山山,来年长满红伞伞
关注博主不迷路